
By integrating Calendly with HeavySet Tech, your form can display real-time availability, allowing website visitors to quickly select and book open slots. This integration prevents overbooking, ensures appointments don't exceed your team's capacity, and simplifies the entire scheduling process for both you and your clients.
By using Calendly with HeavySet Tech, you can connect multiple calendars — such as Outlook or Microsoft 365 — to manage your availability all in one place. This integration automatically checks blocked time slots across all connected calendars to keep your schedule accurate. You can set up a single calendar per schedule or multiple calendars for the same schedule, providing the flexibility you need for your unique workflow.
Why Connect Calendars?
Every time a user interacts with your HeavySet Tech form, our platform checks your connected calendars for availability and displays open slots based on the defined recurring schedule. You can:
- Block days on a specific schedule when needed.
- Choose to automatically block major holidays.
- Handle multiple availability blocks across different calendars.
- Have appointments automatically added to your calendar once booked.
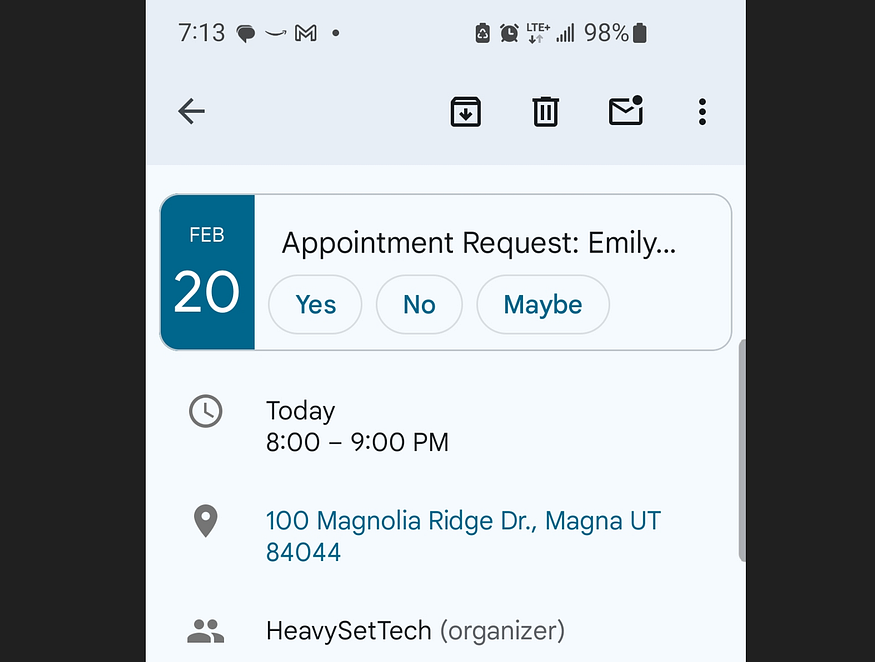
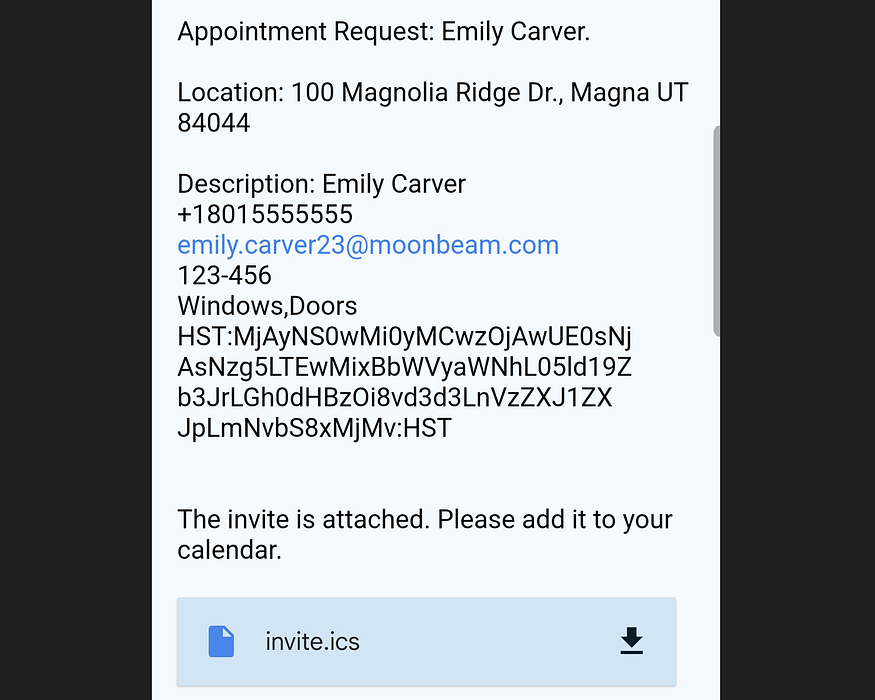
When an appointment is created through HeavySet Tech, an invite is sent to
the calendar's associated email. Most email clients let you whitelist our
sending address (info+calendar-replies@heavyset.tech )
so that appointments are automatically added to your calendar.
If you select the appointment and click No to decline, our platform is immediately notified and makes that slot available for another appointment. If you do not respond, our platform will hold your slot until 5:00 PM on Monday if the request is made on a Friday, Saturday, or Sunday. Otherwise, the slot will be released after 24 hours.
Configuring HeavySet Tech with Calendly
1. Log into HeavySet Tech
1. Visit: https://admin.heavyset.tech/
2. Go to CONNECTIONS -> CRM -> Edit Config in the left side menu or directly visit https://admin.heavyset.tech/settings/crm/edit.
2. Connect Your Calendly Account
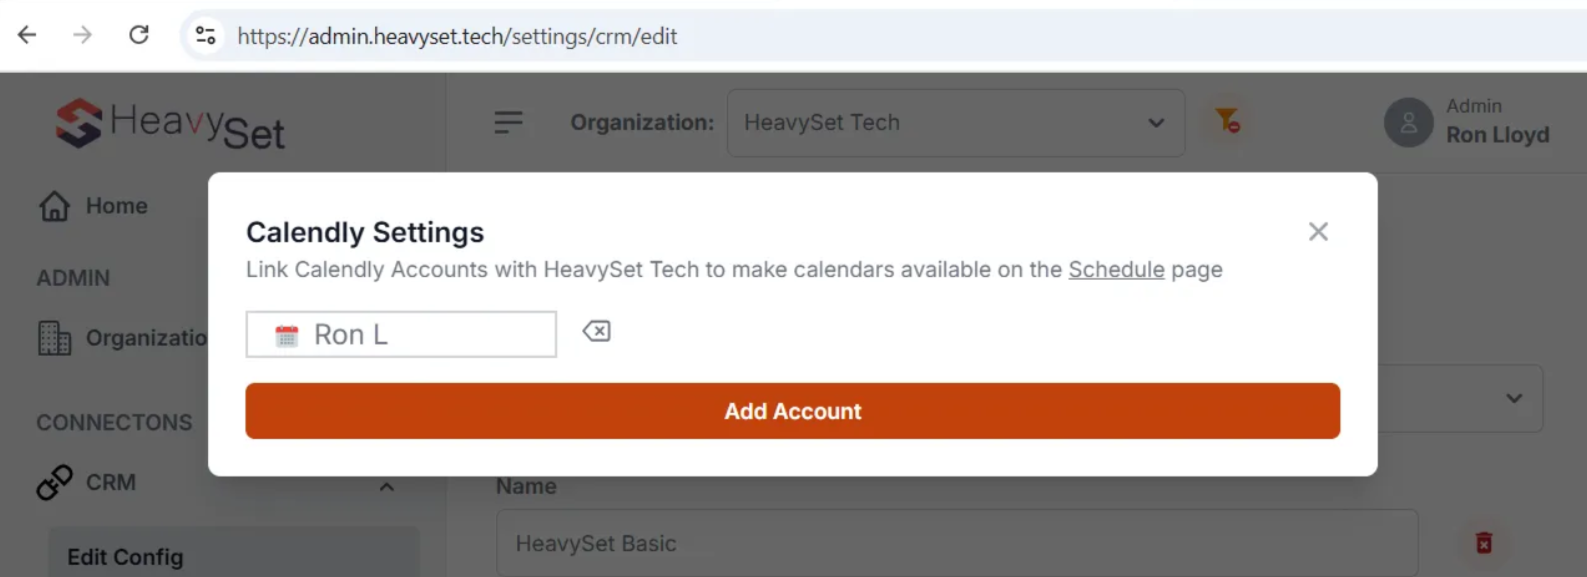
1. Click the Calendly icon to open the Calendly Settings modal.

2. Click Add Account.
3. You will be redirected to Calendly to authorize access.
4. After authorizing, you will be redirected back to HeavySet Tech. Your account should appear in the modal.
- If you don't see it after a few seconds, refresh the page and click the Calendly button again.
3. Configure Your Schedule
1. In the left side menu, go to CRM SETTINGS -> Schedules -> Schedule.
2. Click the Edit icon to edit an existing schedule or click "Add Schedule".

3. Click the Calendly button to add a calendar to this specific schedule.

4. In the dialog, choose your Calendly Organization and Calendly User from the dropdowns.
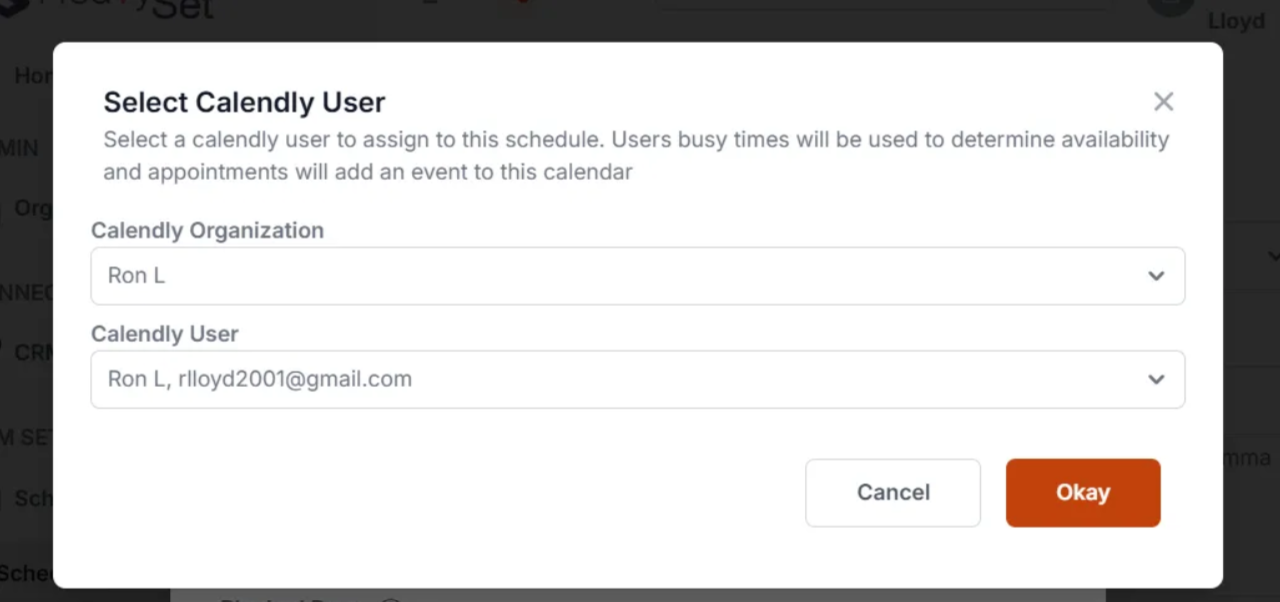
5. Click OK and then OK again.

6. Don't forget to click Submit to save your changes.
4. Test Your Availability
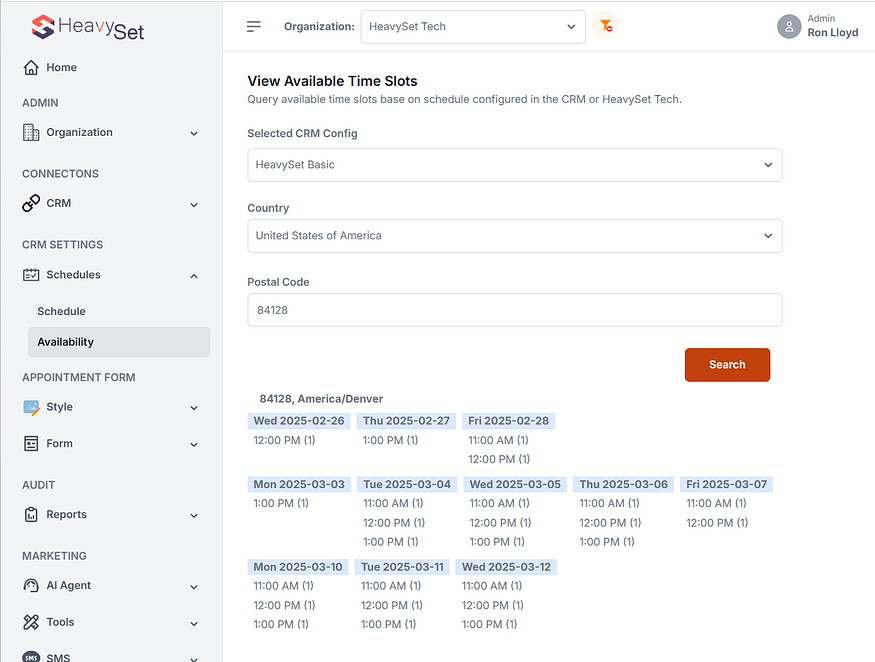
- In the left menu, click Availability or visit here.
- Click Search to view your current availability based on the newly integrated Calendly calendars.
5. Managing Appointments
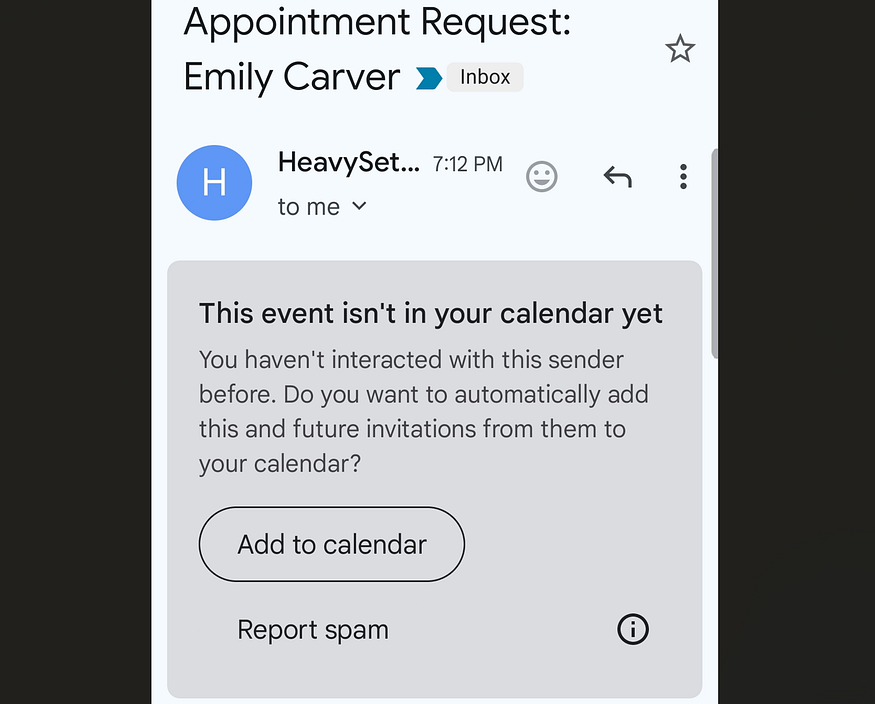
When an appointment is scheduled, a calendar invite is sent to the designated email address with details about the appointment (including location). On many mobile devices or email clients, you can click an Add to calendar button to ensure future invites are automatically added to your calendar.
Troubleshooting Missing Availability
If expected appointment slots are not appearing, the issue may be caused by either calendar conflicts or schedule settings in HeavySet Tech.
Even when Calendly is connected correctly, availability will not appear if the date has been manually blocked in the schedule.
Check for blocked dates in the schedule
- Go to CRM SETTINGS -> Schedules -> Schedule.
- Edit the schedule you want to change.
- Remove the block for the date you want to reopen.
- Don't forget to click Submit — your changes won't save without it.
- Wait 5–10 minutes, then test availability again.
For example, if Friday 3/13 is blocked in the schedule, no time slots will appear for that date until the block is removed.
If the date is not blocked and availability is still missing, verify that the connected calendar does not already have time reserved for that schedule.
Final Tips
- Whitelist
info+calendar-replies@heavyset.techin your email client to ensure invites are automatically added to your calendar. - Declining an invite in your email/calendar will free up that slot immediately for another appointment.
- If you ignore an invite, our system will automatically release the slot at 5:00 PM on Monday if the request is made on a Friday, Saturday, or Sunday. Otherwise, the slot will be released after 24 hours.
By connecting Calendly with HeavySet Tech, you can display real-time availability directly in your HeavySet Tech form, allowing website visitors to select and book open slots without exceeding your team's capacity. This integration automatically updates schedules across all connected calendars, preventing double bookings or overscheduling and making the appointment process easier for both you and your clients.
Gmail
Add info+calendar-replies@heavyset.tech as a contact in order to auto add appointments to your calendar.
Event settings should be set to "From everyone" or "Only if the sender is known" (requires info+calendar-replies@heavyset.tech as a contact).
Microsoft 365 / Outlook
Add info+calendar-replies@heavyset.tech as a contact.
Sign Up
If you're not yet using HeavySet Tech, you can schedule a live demo here to see how our platform can benefit your business.
Comments
0 comments
Please sign in to leave a comment.